
rig
an apparatus, device, or piece of equipment designed for a particular purpose
In filmmaking you’ll encounter different kinds of rigs. Most commonly lighting and camera rigs but it can really refer to any piece of equipment put together for a specific purpose.
This article will cover 4 different way you can rig out your camera like an industry professional might do (on a budget!). It will briefly explain the purpose or use case for each of the rigs and give a cost estimate.
So, let’s get straight to it with the first rig which I lovingly refer to as:
The Professional
It is big. It has presence. It shows you know what you’re doing.
It is the rig you take to impress your clients and from my experience is also what most filmmakers strive to have once they start getting serious about their craft.
But aside from that it actually has function not just form.
Now, what makes up this rig and what would I use it for?
Let’s take a look:
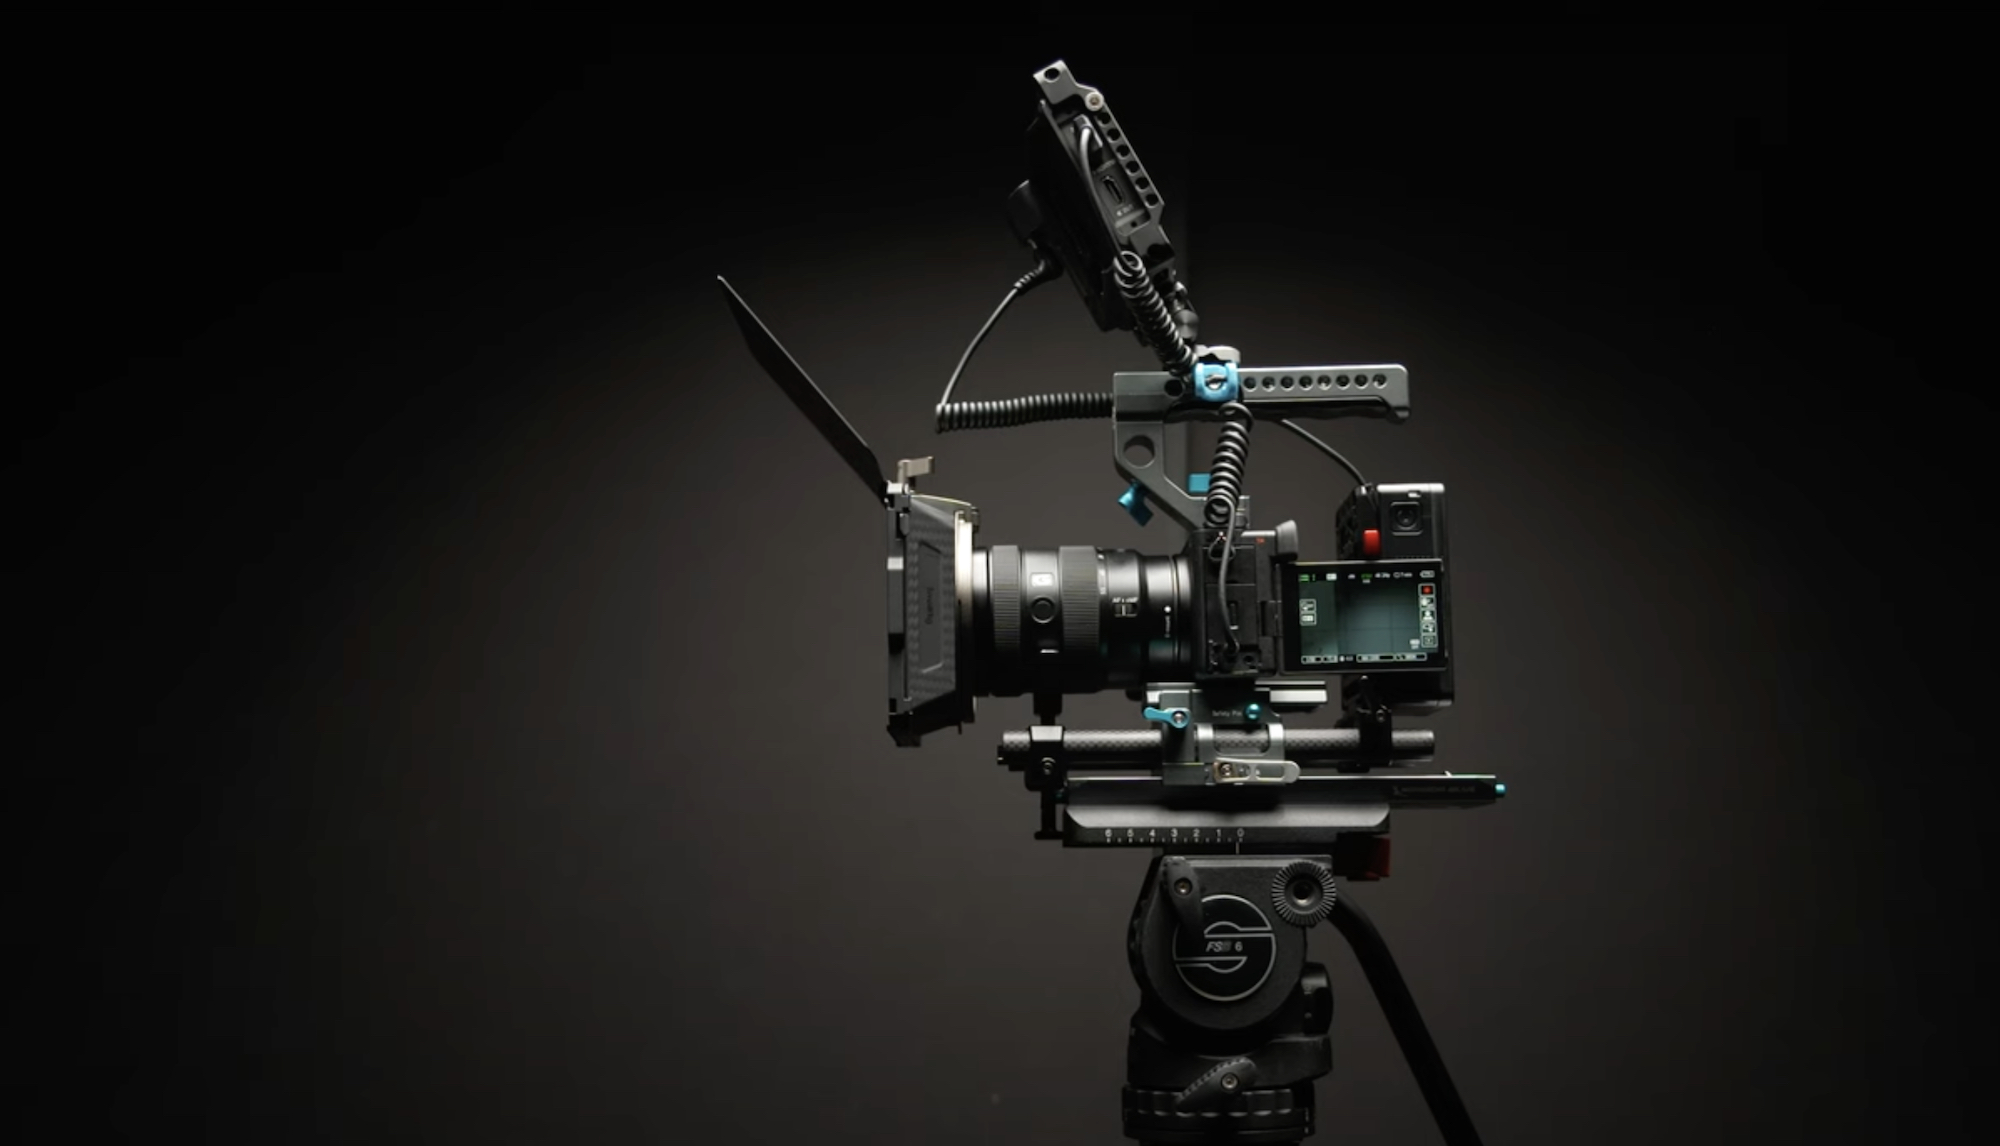
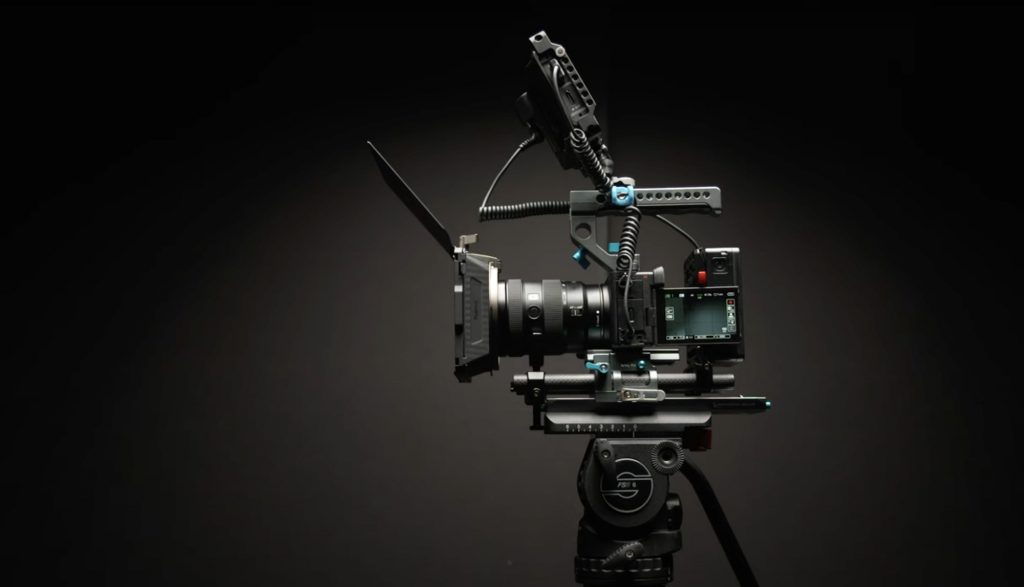
The camera is a Sony A7 IV.
The entire rig is built on a SmallRig half cage to make it smaller and reduce weight.
It is equipped with a standard SmallRig top handle.
- Cage – for mounting other items
- Handle – for versatility in use
- V-Mount battery – for powering everything from one source
- External Monitor – for professional monitoring of color and composition
- Follow focus – for more precise focus pulling
The Minimalist
Once you’ve had The Professional and learned to appreciate all its strengths you will also see all its weaknesses. Its cost, its weight, its set-up time just to name the main ones.
So, what’s the solution?
Going minimalist.
A cage and a handle. Who needs more?
The Smooth One
This in my opinion is the most versatile, practical and fun one out there.
And the beauty is it’s not even particularly expensive.
The One Man Show